
 Renamerox
The Simple Way To Rename, Copy And Move 100s or 1000s of your files and folders with a single Drag-and-Drop using presets.
Rename, copy and move
When you want to prepare files or folders for your website, blog, and backups, or when you need to organize or duplicate files, or when you make copies of your audio and image files for your iPod, iPad or iPhone, you spend valuable time copying and renaming each item by hand.Use Renamerox to rename, copy and move hundreds or thousands of files and folders with a single drag-and-drop.
Renamerox is an application that renames, copies or moves your files and folders with a powerful engine, making your daily work flow easier. You no longer need to alter each file or folder by hand.
More Why navigate through all the folders on your hard disk?
Renamerox supports drag-and-drop. An intelligent Drag-and-Drop engine makes the application easy to use. Drop as many files as you want or a folder that contains hundreds or thousands of files to the main window or to the application icon to rename, copy and move your files and folders.
In order to have different settings for different jobs, use a preset for each job.
The powerful renaming engine allows you to:
When you drop files or folders on the Renamerox application icon, Renamerox will start up and will immediately begin the job. If the checkbox "Quit after Job" is checked in the preferences, Renamerox will quit automatically after the job is finished.
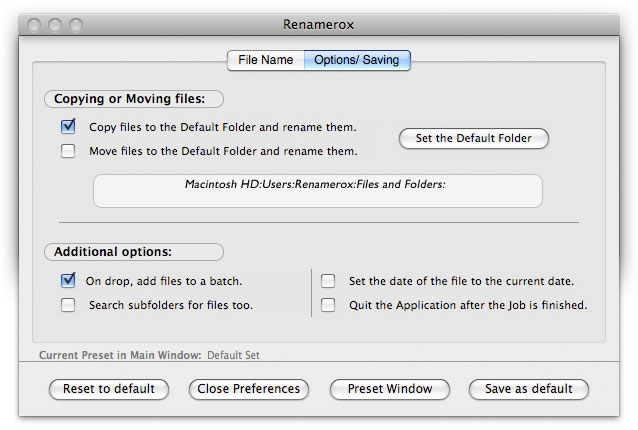
Renamerox offers several additional options to optimize the renaming process.
Requirement: Mac OS X 10.4 or later (Mac OS X 10.x should work too).
Less
Download demo version
Software agreement:
The software license agreement can be seen here.
Demo limitation:
In the demo version two letters will be added to the item name.
The purchased version would be without any limitations.
Deinstallation:
Just put the application in the trash.
Requirement:
Mac OS X 10.4 or later (Mac OS X 10.x should work too).
Smart and powerful
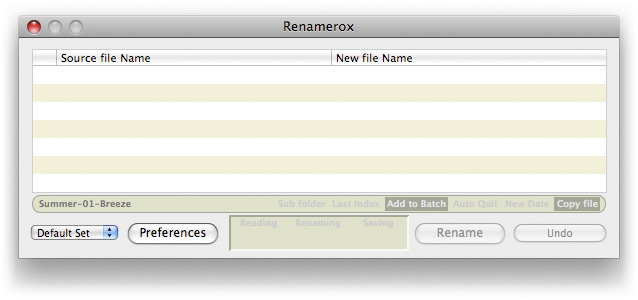
Main window
 More
More
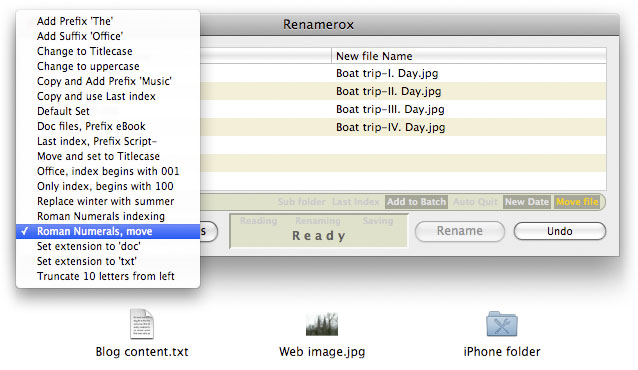
The preset menu gives you the possibility to choose your already saved presets.
The default preferences are saved under Default Set.
Generally you need to set the preferences and save them to use the software. However, if you need different settings for different jobs, then you need to use the presets.
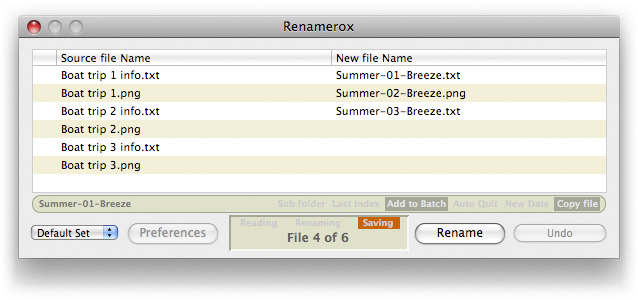
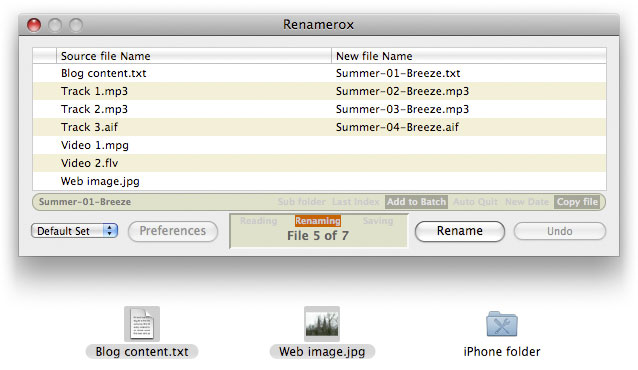
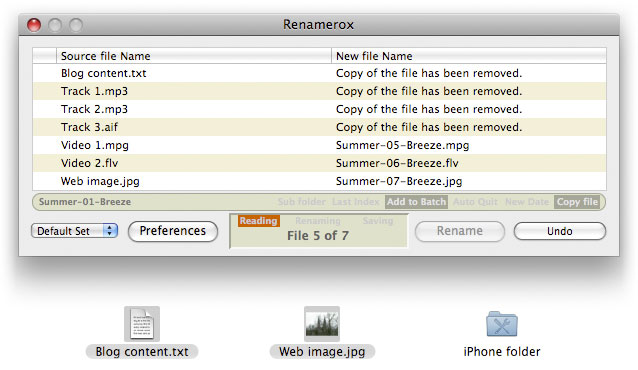
When you click on the Rename Button, Renamerox will begin its work. In the display field you can see what Renamerox is doing.
In the file list, you can see which items (files or folders) were already renamed.
Pressing the ESC or Command and "." key cancels the renaming process.
In Copy File mode and in Move File mode the items will be renamed and copied or moved in the Default Folder. If you did not set a Default Folder before, you will be prompted to choose a folder in which to put the items.
Press the Undo Button to undo the renaming process. The undoing process reverts to the original names of the items.
In Copy File mode all the copied items will be removed. In Move File mode all the moved items will be moved back.
Preferences
 More
More
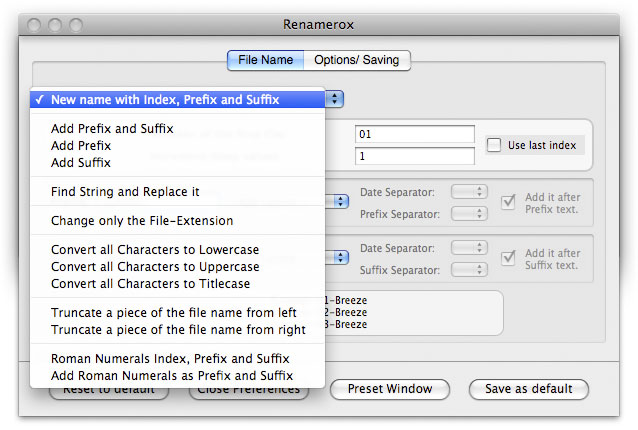
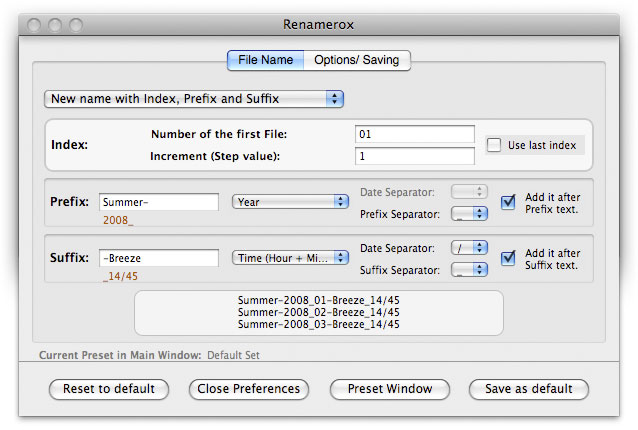
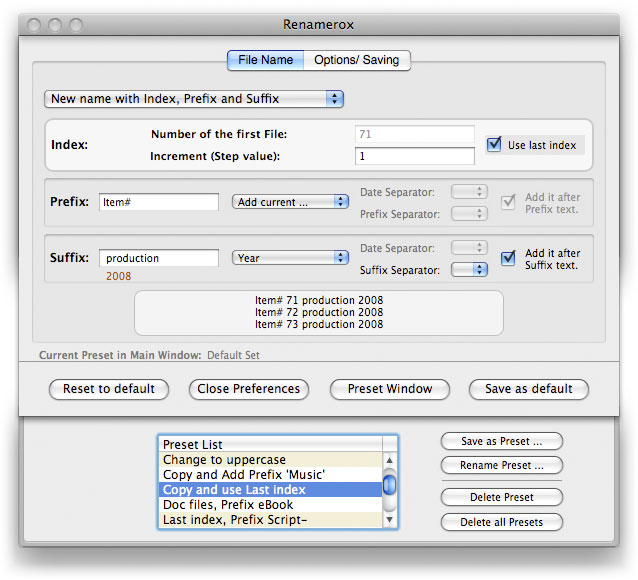
In this menu you can set the new name of files and folders with index, prefix and suffix.
Set the index of the first item, increment (step value) and a prefix and/or a suffix to create the new item name.
The Last Index box allows you to continue with your last saved index number in each preset.
You can see the result of your setting for the first three item names in the Name Control Display.
Additionally, you can add the current date or time to your prefix and suffix.
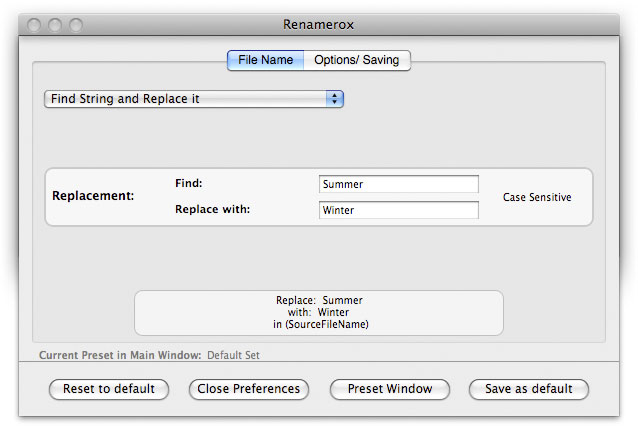
In this menu point you can replace a piece of the item name with another one.
Set the piece of the image name which you want to replace in the Find field and the new piece in the Replace with field. This option is case sensitive.
In this tab you can switch on/off several options which optimize the renaming process.
The preset list contains all presets which were saved. To see the setting of a preset, select it in the preset list. Its setting will load and you can go through the tabs of its setting.
Demo limitation:
In the demo version two letters will be added to the item name.
The purchased version would be without any limitations.
Less